Change the fields above to your information and then Select "Settings"
Netsell Email Client Setup
Secure webmail page here: https://mx1.netsell.com
Otherwise, setup up your email client:
For all examples below put in your domain name instead of netsell.com. For example: mx1.yourdomain.com
User Name: email@netsell.com (put in your full email address)
Incoming server:
POP Server: mx1.netsell.com (With POP, all mail is downloaded to one
device or email client) Port 110 (SSL = Off)
or
IMAP Server: mx1.netsell.com (With IMAP, all mail is saved on
the server and can be viewed by multiple devices and email clients - this is
preferred if you want your mail on your smart phone as well as your pc) Port
143 (SSL = Off)
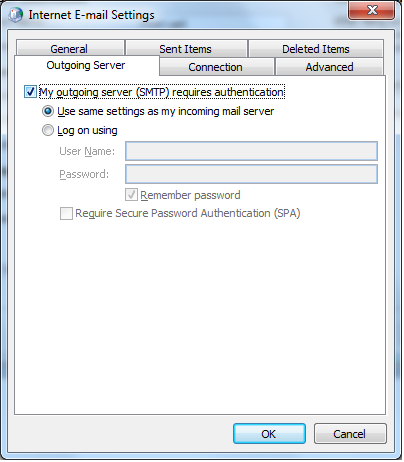
Outgoing Server:
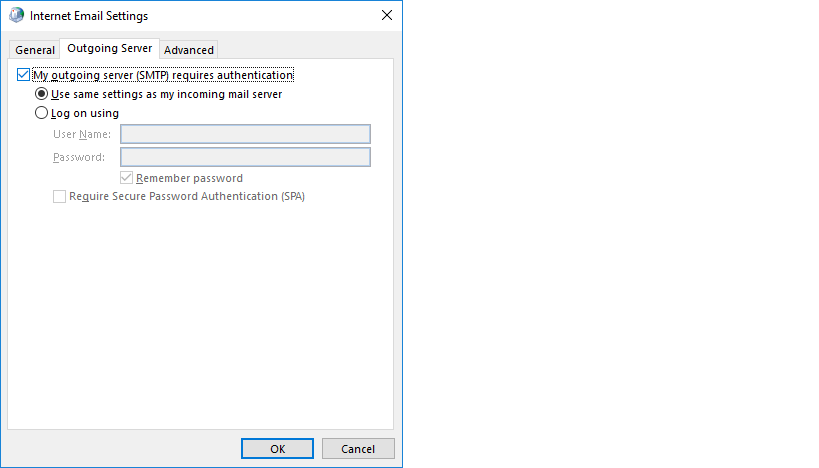
SMTP Server: mx1.netsell.com (requires authentication and a
change of standard port, see below) Port 26 (SSL = Off)
Most ISP's block outgoing email on the standard port (25)
and force you to use their email servers.
To allow your outgoing mail to go through the Netsell email server, you'll need to do the following:
SSL:
If you wish to use SSL (for encryption between your device and our server),
use these settings:
server = mx1.netsell.com (do not use your domain name as
listed above)
username = your full email address
POP port = 995 (SSL = on)
IMAP port = 993 (SSL = on)
SMTP port = 465 (SSL = on)
CalDav:
For syncing Calendars and Contacts when using IMAP
caldavsynchronizer.org/download
Setup For:
Outlook Express
Outlook 2003
Outlook 2007
Outlook 2010
Outlook 2013
Outlook 2016
Thunderbird
iPhone
For Outlook Express:
Open Outlook Express and go to the Tools menu and select "Accounts".
On the next screen, Select the account you wish to change (there's probably only
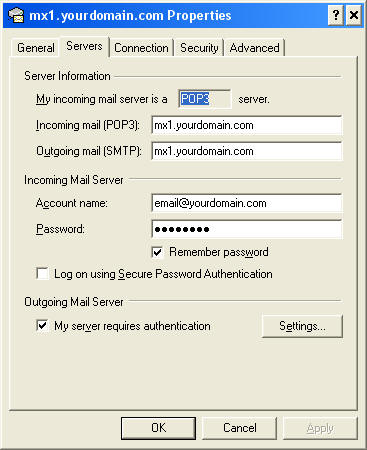
one there) and Select "Change"
Change the fields above to your information and then Select
"Settings"
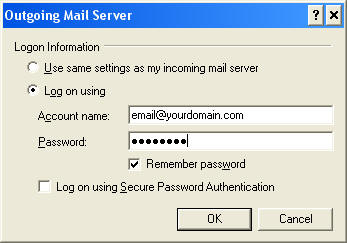
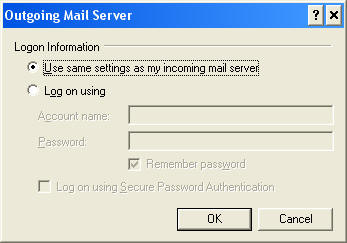
Change the fields above to your information or use the second example
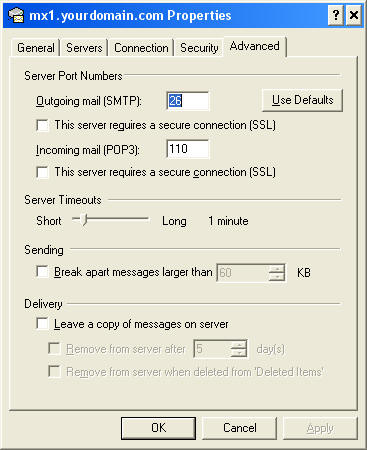
Change the SMTP port to 26 from 25
Click OK and Close
For Outlook 2003:
Open Outlook and go to the Tools menu and select "Email Accounts".
Select "View or change existing email accounts" and "Next"
On the next screen, Select the account you wish to change (there's probably only
one there) and Select "Change"
Change the fields above to your information
Select "More Settings..."
Change the fields above to your information or use the second example
Change the SMTP port to 26 from 25
Click OK
You may want to "Test Account Settings" at this point to see if everything is
entered correctly.
If everything checks out, Select "Next" and then "Finish"
For Outlook 2007:
Open Outlook and go to the Tools menu and select "Email Accounts".
Select "View or change existing email accounts" and "Next"
On the next screen, Select the account you wish to change (there's probably only
one there) and Select "Change"
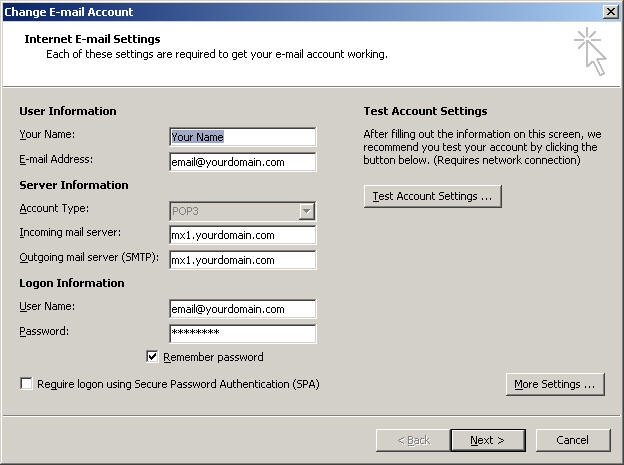
Change the fields above to your information
Select "More Settings..."
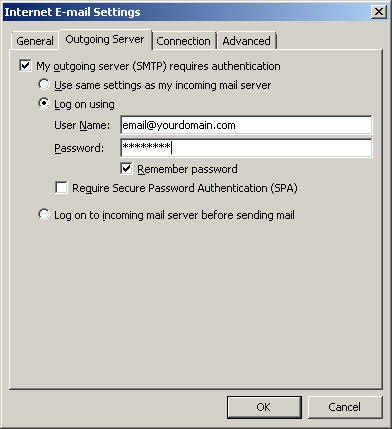
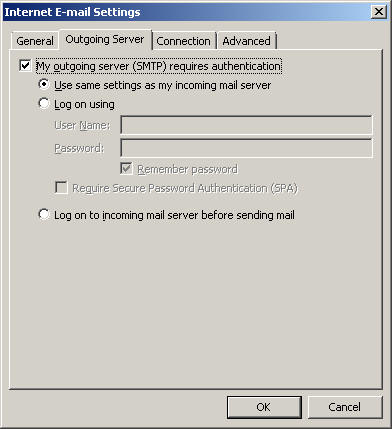
Change the fields above to your information or use the second example

Change the SMTP port to 26 from 25
Click OK
You may want to "Test Account Settings" at this point to see if everything is
entered correctly.
If everything checks out, Select "Next" and then "Finish"
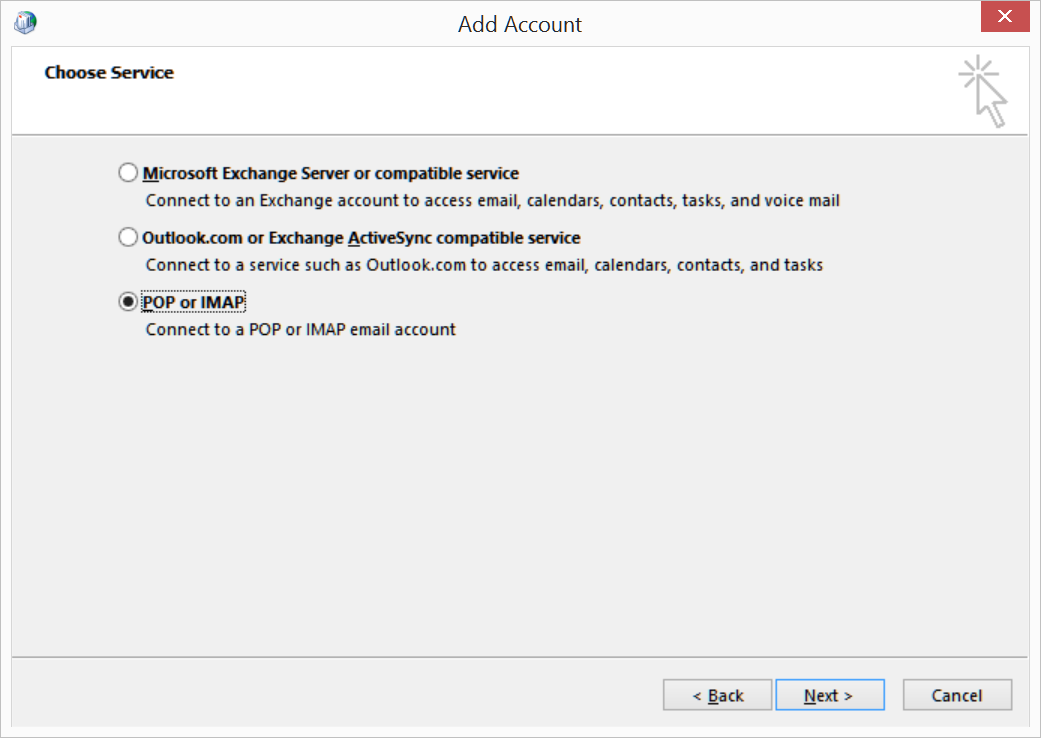
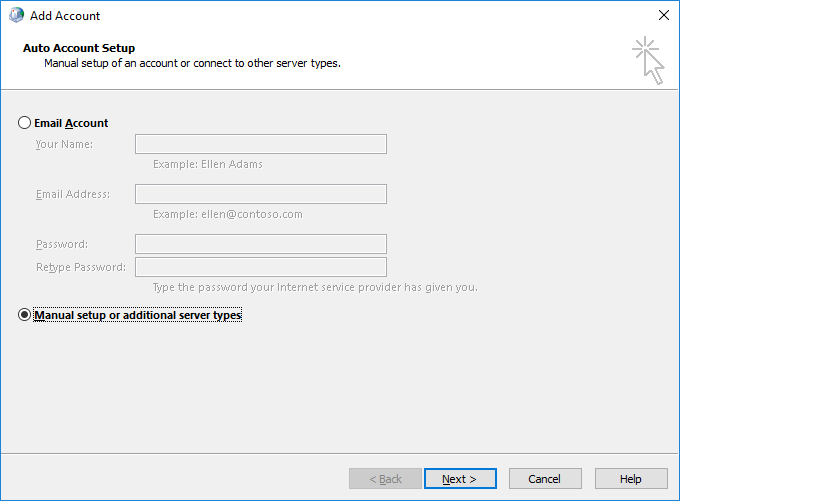
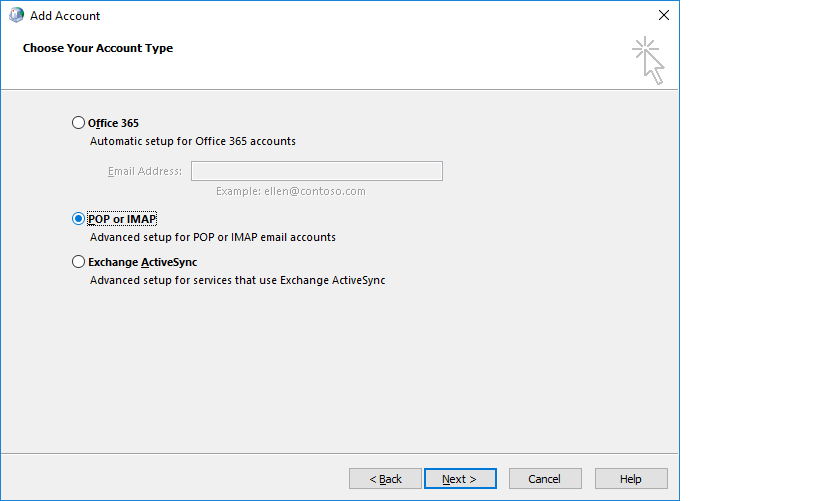
For Outlook 2010:
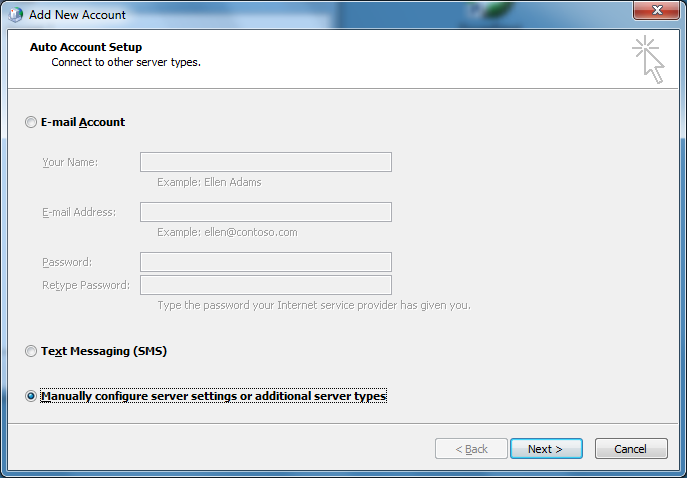
Open Outlook and setup a new account:
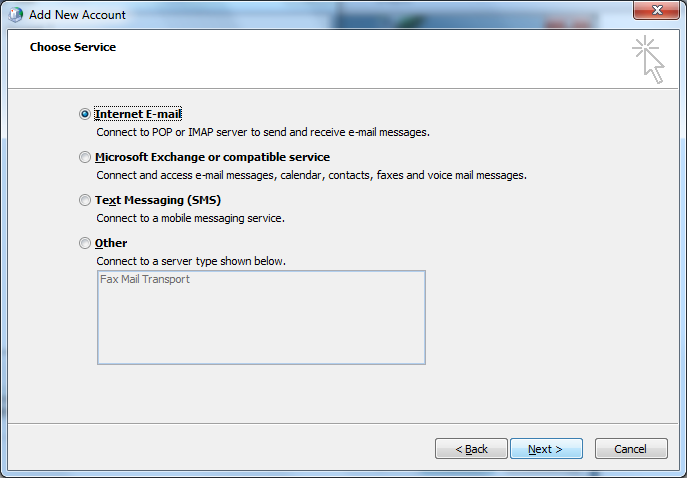

Change the fields above to your information
Select "More Settings..."
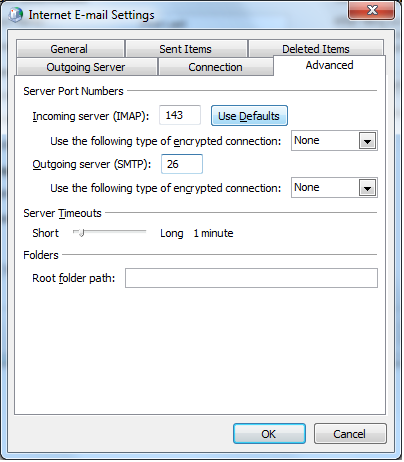
Change the SMTP port to 26 from 25
Click OK
You may want to "Test Account Settings" at this point to see if everything is
entered correctly.
If everything checks out, Select "Next" and then "Finish"
For Outlook 2013:
Open Outlook and setup a new account:
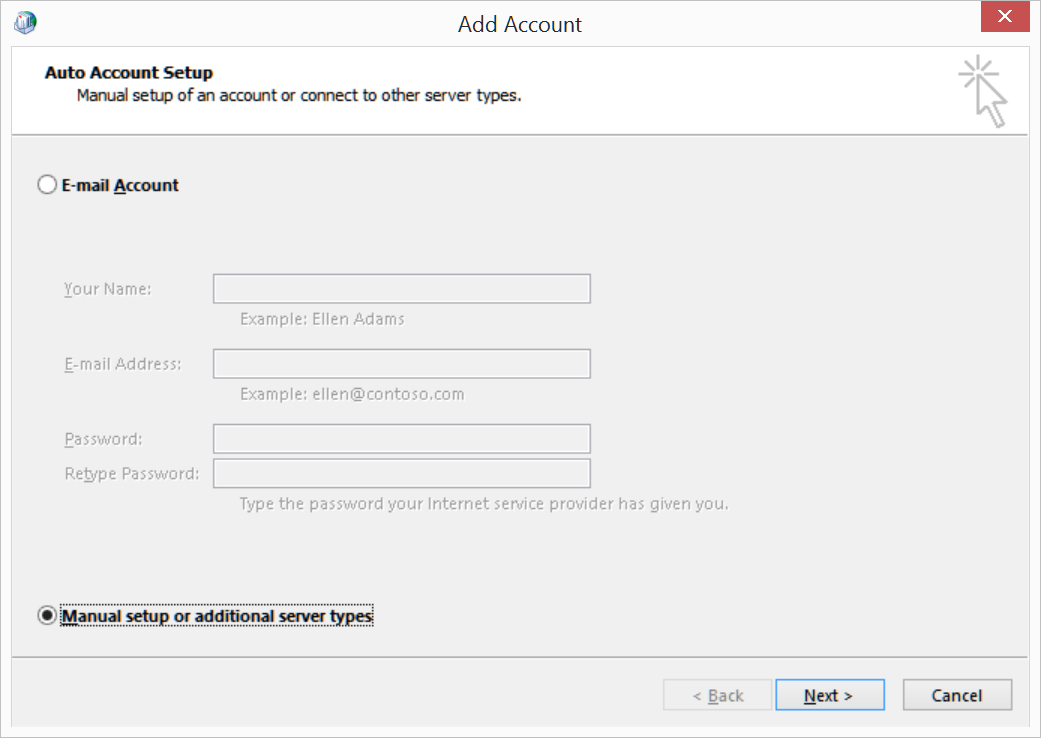
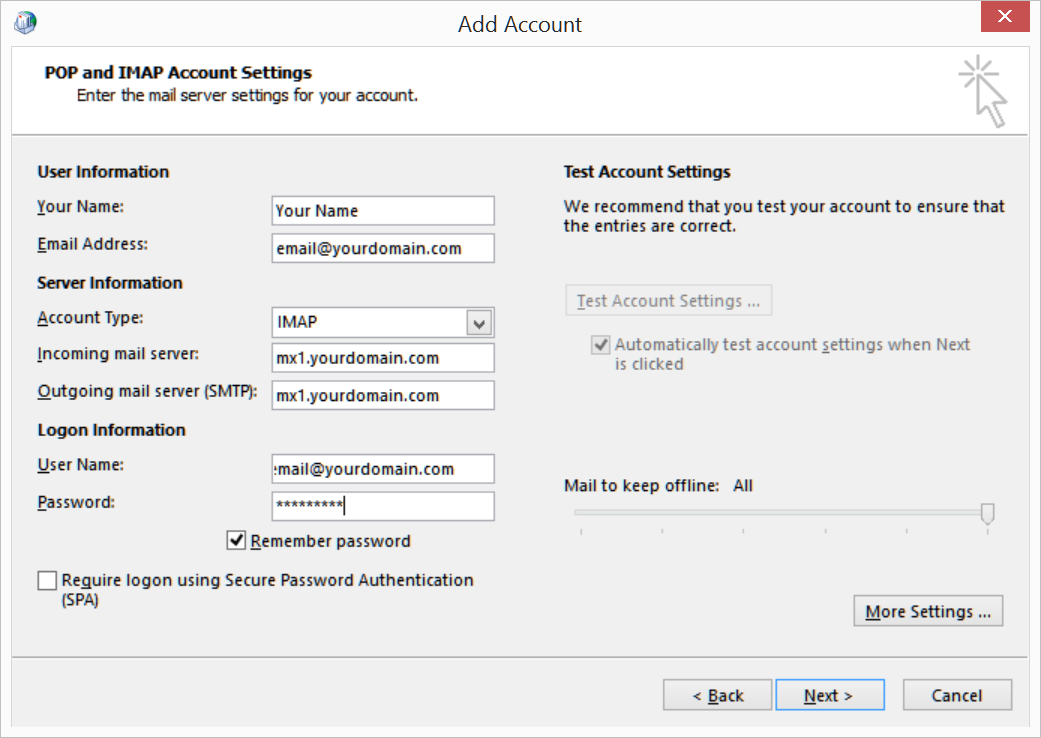
Change the fields above to your information
Select "More Settings..."

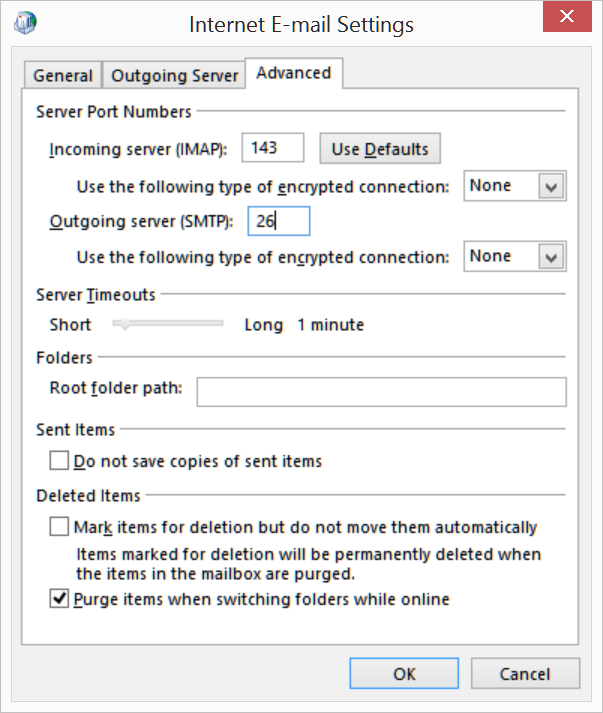
Change the SMTP port to 26 from 25
Click OK
You may want to "Test Account Settings" at this point to see if everything is
entered correctly.
If everything checks out, Select "Next" and then "Finish"
For Outlook 2016:
Open Outlook and setup a new account:
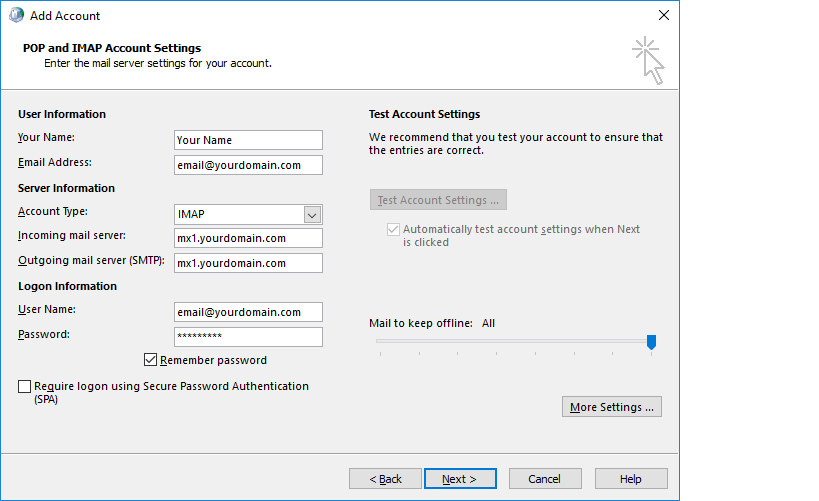
Change the fields above to your information
Select "More Settings..."
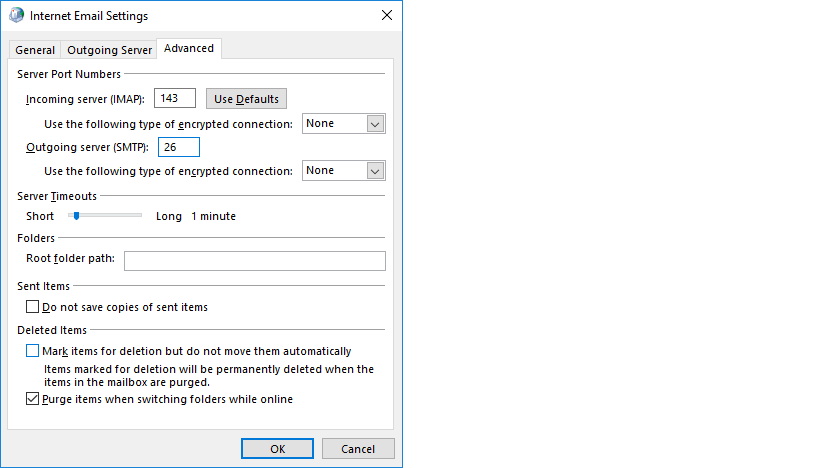
Change the SMTP port to 26 from 25
Click OK
You may want to "Test Account Settings" at this point to see if everything is
entered correctly.
If everything checks out, Select "Next" and then "Finish"
For Thunderbird:
Open Thunderbird and go to the Tools menu and select "Account Settings".
Click on "Outgoing Server (SMTP)" and then "Edit"
Change the fields above to your information, Select "OK" twice
For iPhone (Using your hostname without SSL):
Open up Settings
Open Mail, Contacts, Calendars
Add Account...
Other
Add Mail Account (fill in your information), Next
Select IMAP
Incoming Mail Server:
Host Name = mx1.yourdomain.com
User Name = your full email address
Password = your password
Outgoing Mail Server:
Host Name = mx1.yourdomain.com
User Name = your full email address
Password = your password
Next (it will now try to verify...)
You will get a message like: "Cannot Connect Using SSL" - Select No
Select Save and then Save again
Go to the newly created account, Account Info
Outgoing Mail Server, SMTP
Primary Server, mx1.yourdomainname.com
Server = ON
Use SSL = OFF
Authentication = Password
Server Port = 26
click Done
go back to Account Info
Advanced
Incoming Settings
Use SSL = OFF
Authentication = Password
IMAP Path Prefix = /
Server Port = 143
go back to Account Info
click Done
Go back to the home screen and try the Mail app
For iPhone (Using netsell.com and SSL):
Open up Settings
Open Mail, Contacts, Calendars
Add Account...
Other
Add Mail Account (fill in your information), Next
Select IMAP
Incoming Mail Server:
Host Name = mx1.netsell.com
User Name = your full email address
Password = your password
Outgoing Mail Server:
Host Name = mx1.netsell.com
User Name = your full email address
Password = your password
Next (it will now try to verify...)
Once successful, go back to the home screen and try the Mail app